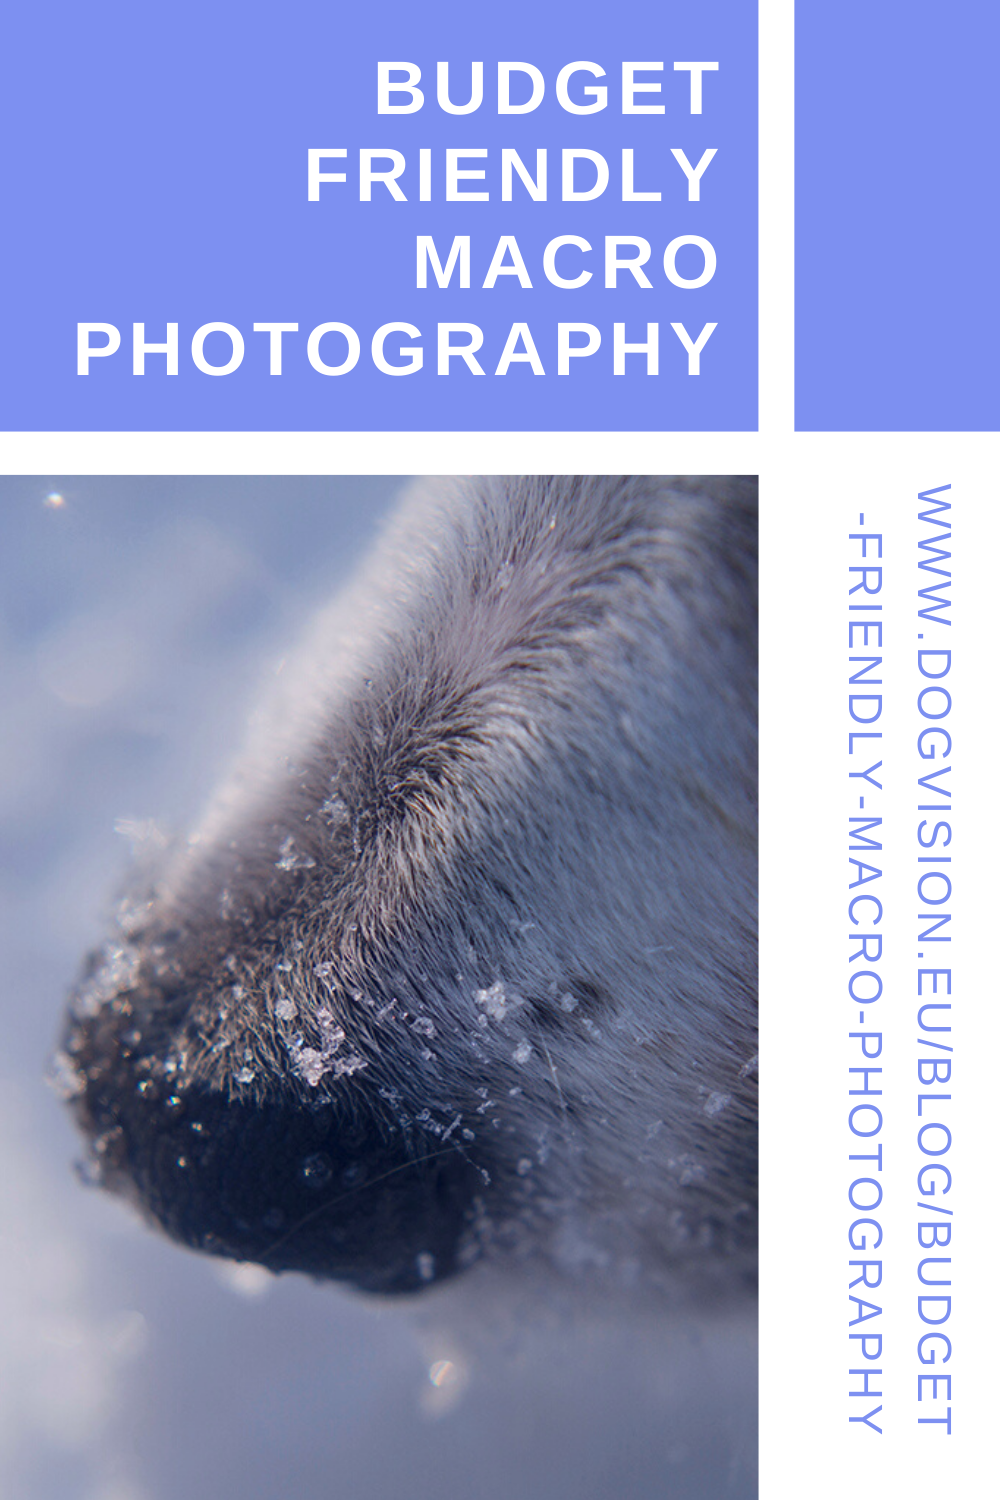
Budget friendly macro photography
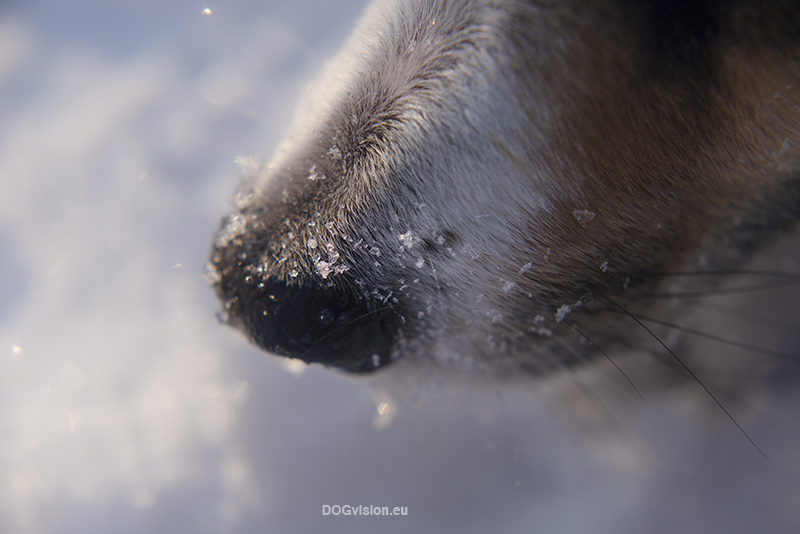
Do you also love all the little details about your dog(s)? I certainly do and I can’t resist sneaking up to them and capture it all. The texture of their wet noses is probably my favourite! Or the marks of their fur! With most lenses, it can be hard to get close enough to make these details stand out, and that’s where we dive into the world of macro photography. Except for my dogs, I have a huge fascination for textures in ice, rocks, and forest plants. It’s incredible how different the world looks when you make tiny objects the main subject. Suddenly details appear that we would never be able to see so clear, so big, and so beautiful.

But I have to confess,… I’ve been a professional photographer for about 15 years and never have I owned or used a macro lens. It’s probably the only kind of lens that I don’t have in my collection that ranges from fisheye to tele-zoom, from new to vintage and even some with weird effects.
So how come?
-First of all, there have always been other lenses that were higher on my lists of most wanted or most needed. Especially when I was still out every week to photograph dogs, I prioritized other gear. Sure macro photography is super beautiful, but I was chasing dogs rather than insects or flowers.
-Secondly, as a student, I had found a great budget-friendly alternative that was still working very well for me.
While it isn’t possible to create close-ups with just andy camera, there are a few ways to go macro:
–Macro lenses of high quality will give you the most sublime results when it comes to sharpness, speed, and they should have the least amount of lens faults.
–Lens reversing rings. Perhaps this works well for some people, but I find it a bit of a weird solution. With this rather bulky extender, you mount your lens backward on your camera. Not only does it look unusual but I’m personally VERY careful with the backs of my lenses when it comes to dust or dirt because that’s the part that normally goes straight into your camera.
–Macro filters. This is what I’ve been using for more than a decade. The system is super simple, budget-friendly, lightweight, and still with all the creative options. You buy these filters as a set of 3-5 filters that mostly range from a +2 to +10, and you can use them separately or combined to make the effect even stronger.
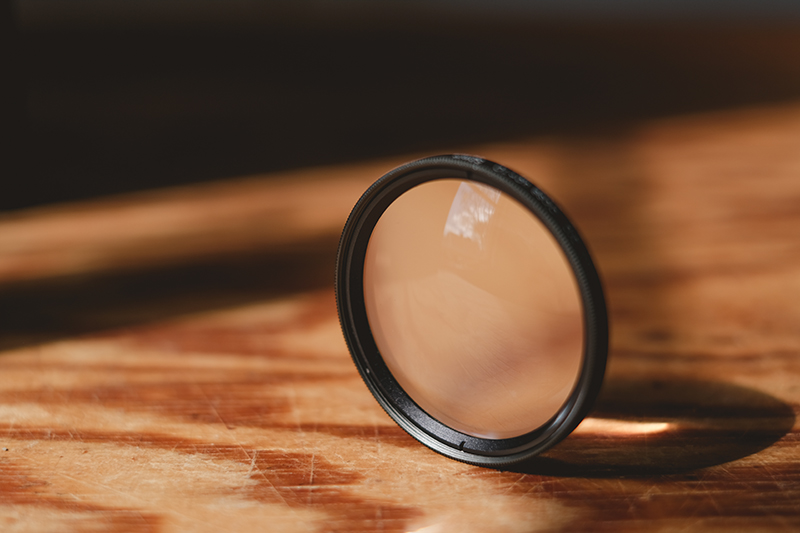
Pro/con of macro filters:
+ budget-friendly
+ lightweight
+ different combinations possible (the higher the number, the closer you will be able to focus)
+ you can still use autofocus.
+ easy to use
+ you don’t have to change lenses, just add the filter.
– you can only focus on objects very close to your camera.
– optical imperfections (like chromatic aberration)
– you need a set that fits another lens diameter (but they are available in a lot of sizes)
– rather soft images
– when photographing animals, they have to be comfortable enough to let you come very close.
Getting started with macro filters:
When you’re looking for a macro filter, you have to check the size of your lens diameter- mostly it’s on the lens cap or engraved on the side near the top.
Note, this is not the same as the focal length which is, for example, a 50mm lens or a 70-200mm. You have to look for this symbol:ø. So you might find something on your lens that looks like this: ø58mm. In that case, you know you have to look for a filter in the same size so it will fit.
Both with my Nikon and with the Fuji camera, I use the macro filters with the 50mm or the crop sensor equivalent. Since I’m outdoors a lot with dogs, I always have a protective filter on my lenses and I leave it on when using these macro filters. I’m aware that this will steal a bit of image quality but that’s ok for me. My suggestion would be to use a lens around 35-55mm as they are often easy to handle, not too heavy and a nice focal length to work with. Using a lens from the telephoto range might require the need to use a tripod to be able to focus. On lenses without a flat glass surface, it’s not possible to mount this kind of filter.
If you’re looking into photographing specific insects or flowers, it’s best to plan your shots by scouting locations and finding the creatures. At the moment, that’s not my main interest but since a set of these filters fits easily in my camera bag, I take them -just in case-. When I’m not out, they are often in my studio space where I use them to document aspects of my (illustration) work, jewelry that I created, or detail shots for the shop.
You might know that I have a huge love for shooting with a large aperture like f2 or f 1.8. When shooting with a filter, however, I always close the aperture a bit because otherwise, the depth of field will be almost non-existent 🙂

PS: the photo above is shot with the combination of 4 filters, getting super close to the crystals, but here you can clearly see the result of optical imperfections like spherical and chromatic aberration with the focus fading away at the corners and a shift of blue in the highlights.