
Before/after @Casthecarolina

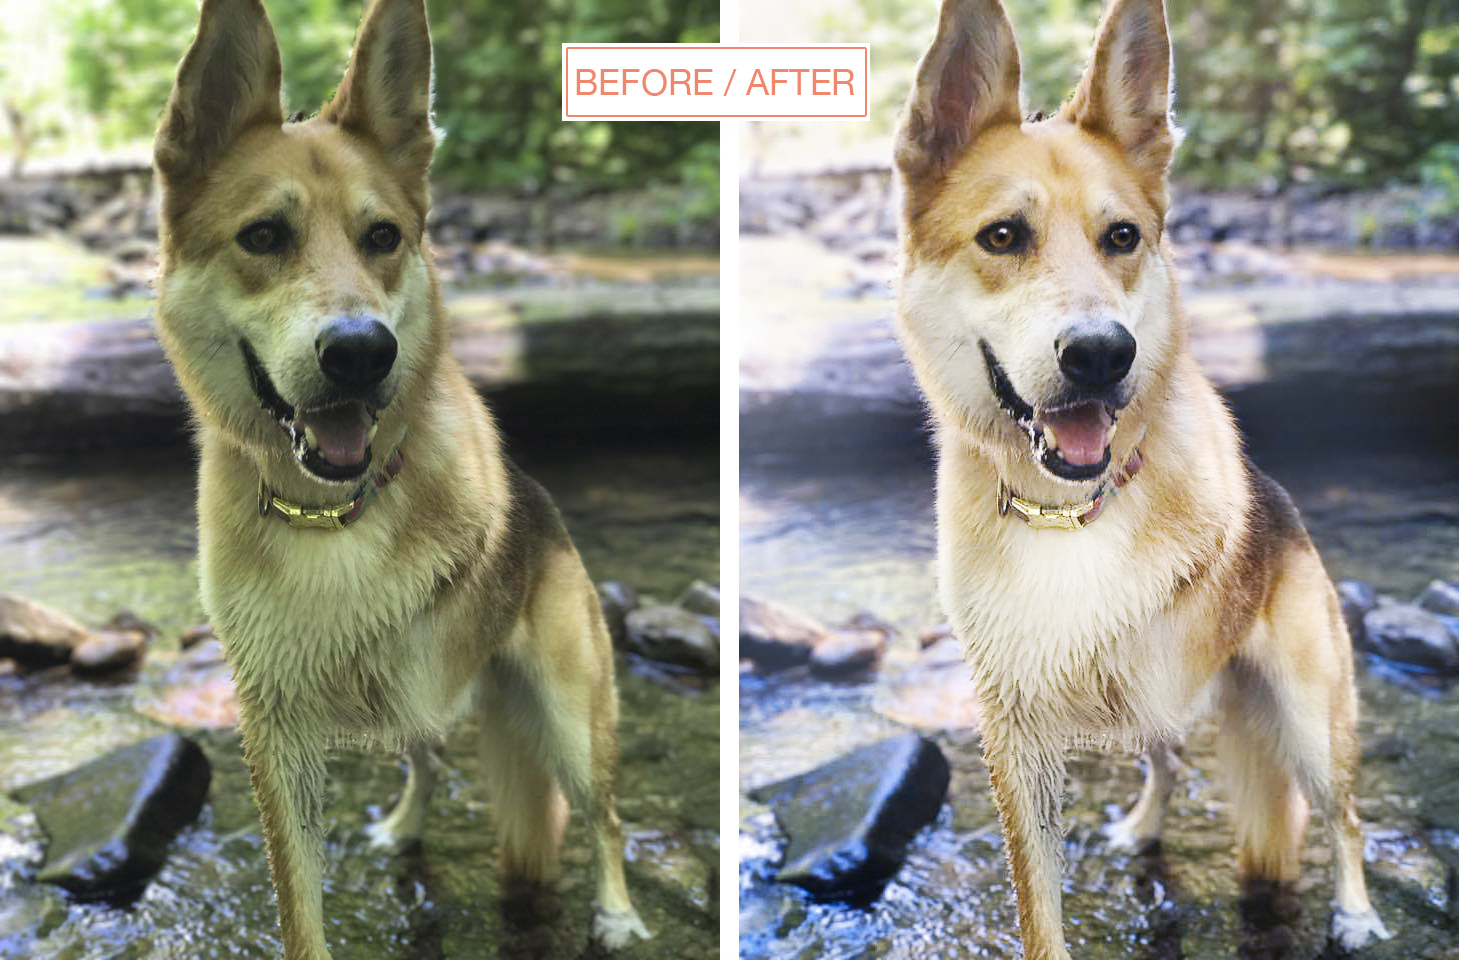
Photo by @Casthecarolina, edit by DOGvision
The scene where this photo of Cassidy was shot, is clearly not the easiest to get a vibrant photo with the right colors. With some strong summer light in he back en green leafs filtering the sunlight, the camera gets confused.
The edit:
Just like I wrote in my blogpost about Lightroom basics, I started with the overall color and contrast adjustments. The photo has a green overcast so I added more magenta with ‘tint’ and reduced a bit the yellow with ‘temperature’ (temp for short). I brought back some vibrance to bring the colors to life and looked for a good balance in lights and shadows with the tone curve
. I also added some blue in the shadows to create a bigger contrast between the blue and the orange- which are complementary colors. With Cassidy being mostly tints of orange, some blue in the background will make him pop.

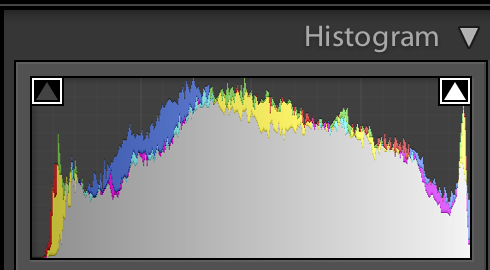
Tip: if you click the 2 arrows of the histogram to make them active, it will show you where you blow out the highlights (white without detail) or where the blacks have been clipped. The white areas will be shows as red, the black as blue (in my version of LR)
After the adjustments in Lightroom, I quickly ran the image through Photoshop for some local adjustments like brightening the white of the fur and also (again) a bit more color. In photoshop I prefer to use a different adjustment layer for each adjustment so I can always delete a layer, go back or change something without the original image being affected. In the end I flatten all layers together. This image was rather small in pixels so I didn’t have to resize it for web. With my own photographs I always keep the original, the edited version in high resolution and a resized version for web with my logo on it.
If you don’t want to edit:
Some people love to edit, or it’s even a big part of their style to edit in a certain way, while others prefer a photo as natural as possible. I guess I’m a bit in between. I love to play with images and I love to explore PS and LR, but personally photographs that are more edit than photo don’t attract me that much.
So if you’re not into much editing for whatever reason, there are some tips to work with:
– Play with your white balance to get a result as natural as possible. Especially look at the parts that should be white.
– Get the exposure right.
– Take a small reflector with you to brighten up the eyes.
– Keep an eye on the light/shadows to make sure your dog won’t look like a leopard.
– If you have the time, go shooting in the early morning or evening when the light is much softer and richer. It will create deep, attractive colors and beautiful textures.
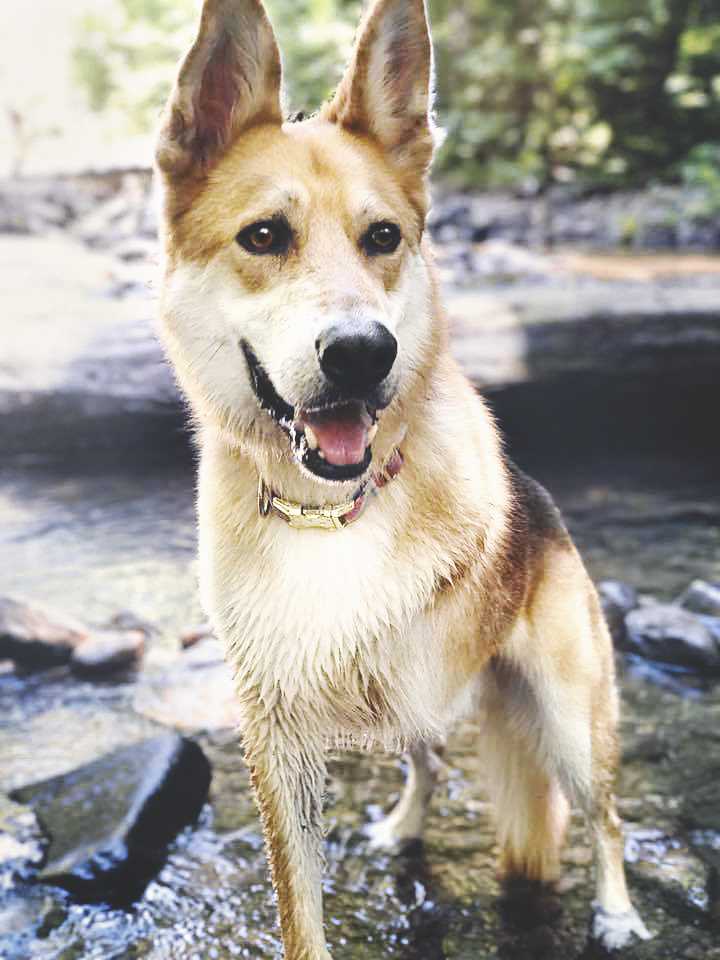
Another edit. Photo by @Casthecarolina, edit by DOGvision